Tag Archives: DIY

26 Weeks | DIY Blackout Curtains

The nursery used to have some pretty horrible-quality roman shades in the windows. We always knew we would get rid of them eventually but wanted to wait and see what the best solution for a replacement would be. I knew, after painting the room, that I wanted curtains in the nursery for two reasons: 1. I love the look of curtains and how they add a richness and softness to any room and 2. I didn’t want to worry about safety issues with blind cords, etc.

The next step was finding the right curtains. I needed them to be pretty long in length (98″) and had such a difficult time finding that length in our budget. Most of the curtains we could afford were the typical 84″ long but I knew I wanted to hang them higher up to add some height to the room. It’s an optical illusion you have to try – seriously. So, to Ikea we went. Or, rather, to Ikea’s website we went! We have an awesome business here in town of a few people who make monthly trips to Ikea and then deliver your order right to your door for quite a bit less money than Ikea charges for their own shipping. Love them!

We decided on the AINA curtains from Ikea and I am so incredibly happy with our choice. I wanted a soft gray color since the room will eventually have a lot of pops of color and patterns going on. Also, if we end up painting the room in a few years, the neutral gray curtains should still work well in there. Not only are they the perfect 98″ in length but their width covers the windows and much more. The best part is that they come with two panels to a package! Most curtains I was looking at only came with one which would double the price since we, of course, needed two panels. But the very very very best part is they were only $50 for the pair! Such a steal when it comes to curtains at that length.

AINA Curtains Ikea

As happy as I was with our curtain choice, there were still a couple of problems. 1. They were extremely difficult to open/close when directly hung on the curtain rod… something I know would be an issue when I have a newborn in one arm and only one arm left to operate these. 2. See how they lose their bunchiness on the ends toward the middle of the window? I know, not a huge deal but my perfectionism was annoyed and this little bit irked me every time I looked at them. 3. I wasn’t thrilled with how very little sunlight they blocked when closed. The nursery gets a ton of natural light, which I absolutely love, but I know I won’t love that fact when I’m trying to help our baby sleep later into the morning or during naps.

AINA Curtains Ikea

So, we went through a couple of options, one of which failed miserably and ended with a return at Home Depot. Finally, I decided I could create some DIY blackout curtains on my own on one single condition… they had to be no-sew DIY blackout curtains. Jo-Anne Fabrics was where I found and purchased my blackout lining material. I found it for $4.19 a yard and was able to purchase 5.5 yards for just over $20. Pretty good considering most of the blackout curtains I looked at purchasing were around $150! Blackout lining not only blocks out light but it also helps reduce outside noise and heat/cold so it’s a great option for nurseries.

No Sew Blackout Curtains

I then laid out the fabric and measured it to be 2 inches shorter than the length of the curtain panel. That way it wouldn’t be peeking out the top or bottom. I cut out two equal panels from the lining (thankfully the width was already perfect so I didn’t need to adjust that). Then, I took my curtain rings we purchased and clipped the lining to the curtains from the back, a few inches below the top. The reason I clipped them this way was we already had the curtain rod hardware installed on the wall and I knew the curtains would be too long if I had to add a few inches to the height to the due the rings. Also, clipping your curtains this way creates a beautiful custom look as you can see in the below photo.

DIY Blackout Curtains

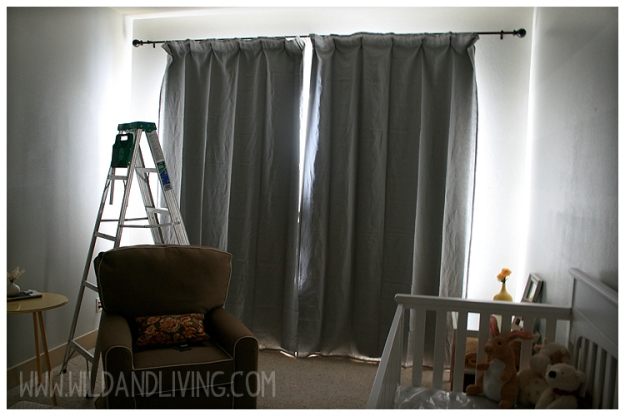
Next up was to hang them! I still wasn’t super impressed with the light flooding the room around the edges but I knew that was fixable. I simply took super strong magnets and hot glued them to the wall and curtains. One on each side of the window and two in the middle where the curtains connect.

DIY Blackout CurtainsThe magnets work so great and I love how easy they are to just snap together and apart, unlike velcro which would be a nightmare!

DIY Blackout Curtains


So much better! The room isn’t 100% pitch black which I’m actually okay with. That way I can still get around the room without tripping over something or fumbling in the dark. But it is definitely dark when these are closed and will be perfect for daytime naps. I love love love how they hang now – they look custom sewn and you can’t even see the curtain rings behind them. So nice! And yes, I am very much against ironing, thank you very much.

DIY Blackout Curtains

I am absolutely thrilled with this project and how it turned out. I love how they look and more important love how they work. We spent way less money than we if we had purchased blackout curtains already made and it probably only took 30 minutes! Here you can see the before and after:

Top Row = Curtains without lining or rings opened and closed
Bottom Row = Curtains with lining and rings opened and closed
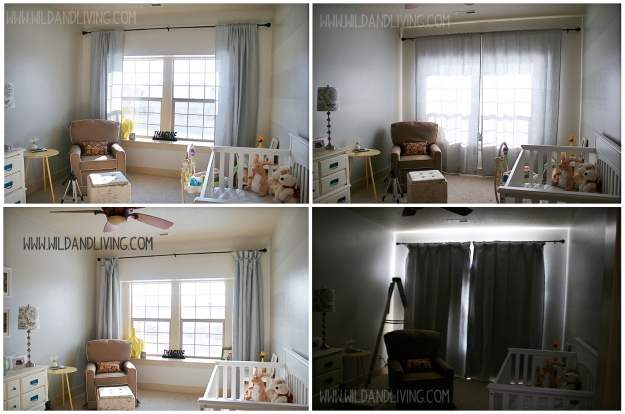
DIY Blackout CurtainsSuch a difference! I’m sure Baby O will appreciate the darkness for morning sleep and nap times… at least I’m hoping she will! 🙂 Next projects up are hanging the Ikea shelves we purchased and making the DIY mobile!


Twenty Five Weeks Progress

Pregnant

I know I say it every post but I really cannot believe I am twenty five weeks already and we only have 15 weeks left or so until we get to meet our little miss. Between Thanksgiving, Hanukkah, Christmas, and New Year’s it’s been a pretty busy month since my last post, which has really helped time fly by. Here are some updates on my pregnancy and feelings throughout:

Oh, sleep, how I miss you: 

I am already subconsciously preparing for a newborn by getting accustomed to waking up multiple times in the middle of the night and being awake at the oddest of hours for (sometimes) hours on end. Of course, if I could choose to have it another way and be able to sleep soundly for eight hours I definitely would but this pregnancy insomnia just isn’t letting up. There are usually a couple nights a week I sleep pretty well but other nights I’m up 2-4 times thanks to my scrunched bladder and horrible hip pain that pillows just don’t seem to be helping. I’ve reached the point of pregnancy where sleeping on my back and stomach is just no longer an option so that leaves me tossing and turning between my left and right side every night, which is also getting more difficult to do with my growing belly. I can’t even imagine how sleep will be when I’m 30+ weeks! This is probably my number two pregnancy complaint with first-trimester morning sickness taking first.

Dance, Baby, Dance:

I’ve spoken with so many moms who tell me how much they loved being pregnant and I can tell you right now I am not going to be one of them! That probably sounds horrible and actually isn’t 100% true (there are times when I really do love it) but I just miss SO many things from my pre-pregnancy days and I have definitely had my fair share of annoying/painful symptoms versus a smooth “I-wouldn’t-know-I-was-pregnant-if-it-weren’t-for-the-ultrasounds” pregnancy. I will say, though, that I will definitely be one of the women who misses certain things like crazy about being pregnant and one of those will definitely be feeling my sweet baby move inside of me. It is absolutely something that you can’t understand unless you’ve experienced it. There are so many wonderful and lovely emotions rolled into those movements and they bring me constant joy and peace. I absolutely love experiencing them from the inside, feeling them from the outside, and being able to actually watch them now, too. And this baby is a mover! I feel her multiple times through out the day and it’s almost guaranteed she’ll start moving if I sit on our couch with my feet up on the coffee table. Usually around 11:00pm or so she starts dancing in there, too, and it cracks me up how on time she is every night! I will definitely miss that part so much.

DIY Projects:

The pillow for the glider is complete! I totally had to just create my own little tutorial for myself because the dimensions were completely different than the 18″x18″ square the original tutorial used. But it (magically) turned out perfect! It’s an envelope cover so I can slip it off and wash it during what I’m sure will be many spills and messes to come.

DIY Cloth Napkin Pillow Cover

I also finished lining the dresser drawers and have them all organized with pajamas and empty drawer organizers from Ikea. The rest will fill up in the next three months I’m sure!

Lined Dresser DrawersAnd we also ordered the 3-pack Skubb boxes from Ikea for the closet – yay for storage!

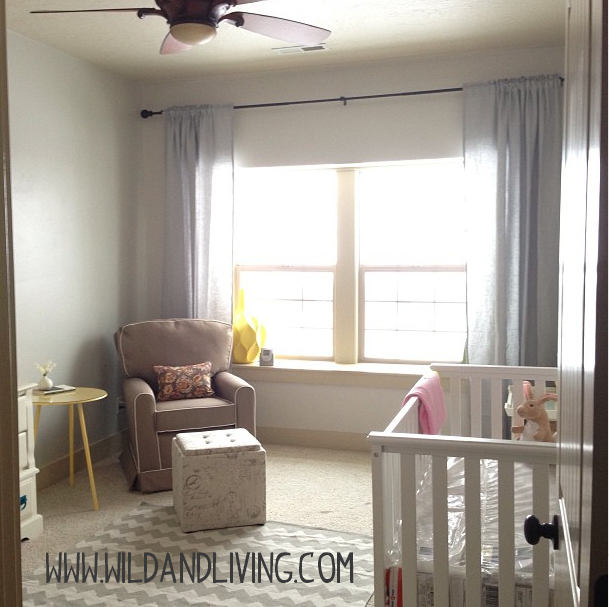
Nursery Closet OrganizationAnd we also hung curtains! I can’t believe how much of a difference they make. The room actually feels like a room now. We have cordless blackout pull-down shades on order so the curtains are more just for looks than anything else (excuse the not-so-great iPhone snapshot).
Curtains in Nursery

Registry:

I spent a week or so researching baby items, reading reviews and ratings, and finally creating a registry. Mostly I was just shocked at how much we still need! So many things you don’t even think about… It was extremely overwhelming but so much fun at the same time. The baby shower invites went out early this week and the shower is scheduled for early February in just a month. Can’t wait to celebrate with some of my favorite women!

Prenatal Yoga:

I used to love yoga! I got out of the habit a year or so before my pregnancy and haven’t really done much over the last six months, either. Our local hospital where we are delivering offers prenatal yoga classes at a totally amazing price ($30/month for twice a week classes = $3.75 per session!). The best part about the class is they have it at a location that is just five minutes away and literally right down the hill from us. So convenient. I had my first class last night and loved every minute of it. I felt a bit awkward this being my first time back to yoga after such a long hiatus but I know after a couple classes it’ll feel so natural to me again. The instructor is fabulous and being in a room with only pregnant women is so freeing and comfortable. One of the women taking the class is due just one day after me! I’m really looking forward to continuing it until the end of my pregnancy and am so thrilled it’s twice a week. (Again, excuse the not-so-great iPhone snapshot…and Lucy).

PrenatalYoga

Date Nights:

Josh and I definitely realize our lives are about to change in a wonderful and massive way. We are trying to get out and be spontaneous on a regular basis (oxymoron?). We’ve enjoyed some great date nights together – some out and about on the town and other times staying in where it’s cozy and warm for a movie. We know that the stability of our relationship and marriage will be so important to our children and it’s the little things as much as the big things that keep it strong.

Date Night

My brain just doesn’t work the same these days and it is seriously difficult to write even one blog post without sounding like a complete jumbled mess so that’s why my posts are now few and far between. I’m hoping this will clear up once the baby is born but from what I’ve heard it just transforms from pregnancy brain to mommy brain so we’ll see I guess! 15 weeks to go – can’t wait!

Nursery Progress | Twenty-Three Weeks

With the change in energy that comes along during the second trimester, I’ve been able to finally get some things together for the nursery and start getting it set up for baby. Hard to believe that in just over three months or so our little bundle will be here! I know it’s going to fly by and I still have so much to do but I’m happy to report the to-do list shrinketh!

First up was finding frames for the wall art I plan on designing. I really wanted to have a symmetrical gallery wall of frames above the dresser/changing combo. My original requirements were 12″x12″ squares, white, and with matting but after finding they were $20 each (and at Ikea nonetheless!) I decided to be open to some other cheaper possibilities. While browsing through Michael’s one day, completely lost and looking for modpodge, I stumbled across these white, matted gallery frames with an 8×10 opening. They were perfect but the clincher was the ridiculous good price. Regularly $10 each, they just happened to be on sale for 50% off making them only $5 each! All in all I ended up spending $30 for six frames versus the $120 I would have spent at Ikea. Score!!! I plan on designing some fun and bright art to brighten up the space a little. The hardest part will be narrowing it down to only six pieces! And I have to say I’m pretty proud of myself for this hanging job… this was my first gallery display but with the help of a yardstick and my grandpa’s level, it turned out pretty even and straight! #miracle

Gallery Wall

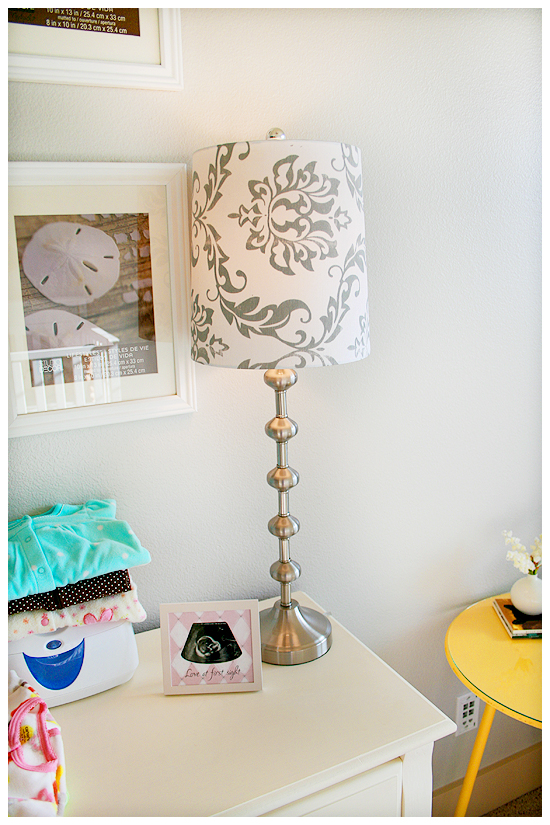
Next up on the shopping list was a new lamp for the room. I wanted something feminine for our little miss and had a few lamps in mind at Cost Plus World Market. I decided to stop in at Home Goods, though, so see if I could find something less expensive and sure enough I did. With the base and shade together it was a total steal and I love it even more than the other ones I was thinking about. It is so beautiful lit up, too, and adds some sophistication and charm to the room.

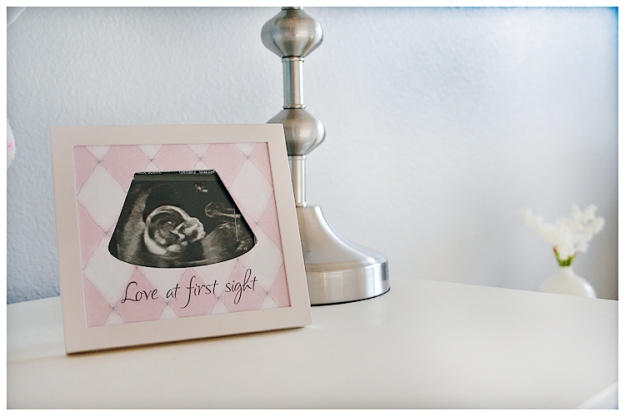
lampAnd see that cute little “Love at First Sight” frame next to the lamp? That was a gift from Josh’s aunt and uncle when we found out the gender and that’s our baby girl’s profile shot in there. Love it.

Frame

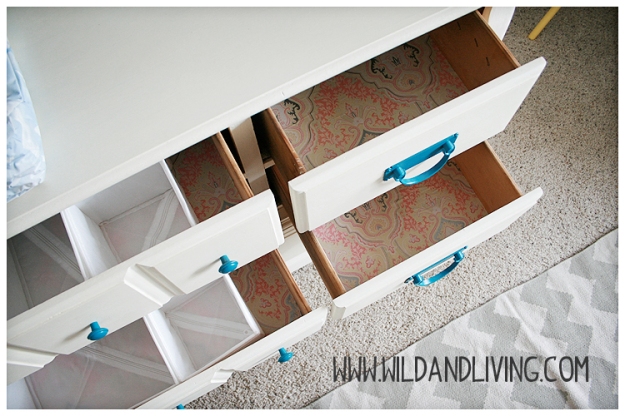
One of my many DIY projects is lining the old dresser drawers with some pretty, elegant paper. I found this beautiful wrapping paper at Michael’s and am working, slowly but surely, on lining the drawers with it using modpodge. I also know you won’t be able to see the lining that often what with all of the clothes, diapers, and things in the drawers but I like the idea of placing the clothes on this pretty paper instead of the who-knows-how-old bare drawer bottoms.

dresser liningWe still have some work to do on this old dresser. Things left to do are 1) Spray paint drawer hardware salmon pink (Josh plans on doing this in the spring), 2) Buy and install drawer stoppers for the backs of the drawers so they aren’t able to be pulled completely out of dresser (safety first!), 3) Oil up the sliders inside so they glide more easily when opening and closing. Poor thing needed quite the update!

That brings me to my next DIY project. I knew the glider would really need a lumbar pillow for lower back support while rocking/nursing our little one. I already had a small travel pillow that was the perfect size but the pillow cover was super blah. Not wanting to spend $25 or more on a new pillow cover, I found a tutorial on Pinterest for cloth napkin pillow covers and knew it was right up my alley. A little known fact about me: I.don’t.sew. Like at all. You should see me “sew” a button back on. It’s basically just threading the needle through once then a million knots tied with my fingers. Hahaha. Note to self: learn to sew.  This tutorial was perfect, though, because you just buy two cloth napkins and use fusible web! Something even I can handle. The tutorial is for an 18″x18″ pillow but I think I can figure it out for this size. I found the cloth napkins at Cost Plus World Market and am in LOVE with them. At just a little over $3 a napkin, it’s a super easy transformation and update. If it works out well, I think I’ll update some other throw pillows around the house. *Disclaimer: one of the napkins is just wrapped around the pillow in this picture to demonstrate as I have yet to start this project!
pillowI also needed a new ottoman to go with the glider. The ones that were sold to match the glider were hundreds of dollars that I refused to spend. We had a cute little red stool that was Josh’s mom’s as a little girl in front of it for awhile but it was just too small/short and the red didn’t go with the rest of the room. I planned on making my own with confidence I could learn to sew but fate had a different option. We were browsing through Ross one day and we came across this lovely ottoman for only $40! By the time I bought all of the fabric, stuffing, and took the time to make my own, this would be such a better deal. I loved that it was so elegant, had similar coloring to the glider, and the best part is the lid comes off for storage inside! Josh plans on buying some hinges to make opening/closing it easier. It’s the perfect size, too, and I can’t wait to spend hours in this little corner reading, rocking, snuggling, and nursing our baby girl.

ottoman
Let’s see… some other little details coming together are the side table. We plan on spray painting the small wicker basket in the spring. Yellow flowers and some sweet framed art… What I love most about my home is who I share it with.

side table

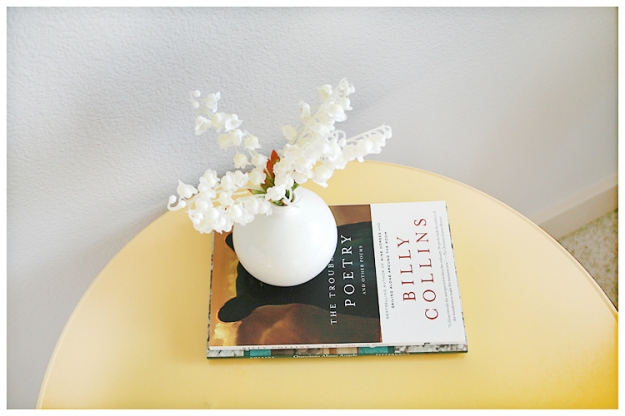
I also found these cute flowers/vase at Goodwill for sixty cents! I love little details like this. And, yes, we are already reading our little girl Billy Collins poetry.

flowers
She’s also already quite the little stuffed animal collector.

stuffedI also plan on making (sewing!!) a hot-air balloon mobile to hang over the crib. I will definitely post pictures once that is done but I have all of the supplies sitting in a bag waiting for me to start. The new year better bring out my craftiness!

What I love about this room is how light and bright it is! It gets optimal sunshine (curtains are on order and blackout lining will be purchased) and feels so cheerful to me. I also like that it is elegant and feminine without being over-the-top girly. I’m definitely not wanting to go after the hot pink and princess stuff (or ideals/attitude) for our little girl and this room really fits the bill when it comes to that idea. It’s been so much fun seeing it come together from painting the walls last summer before I was even pregnant to adding in the furniture and now all of the accessories and projects. It really has been a project of love.

xo

The Beginning | Weekly Snapshots

This was my very first DIY nursery project! I actually completed it a couple months ago before we were even ready to start trying. We knew we wanted to hopefully get pregnant in the fall and I didn’t want to be around any kind of paint while pregnant so I made a list of DIY projects involving paint I could do beforehand.

• Find and paint dresser

• Find and paint other needed furniture (other small dresser, bookcase, or nightstand)

• Paint room walls/closet

• Spray paint accessories

I found this beat up dresser on Craigslist and fell in love with it! I really liked the drawer configuration and the lines of the piece. It was listed for $50 and I knew I could make it into something super cute for the nursery. My dear sister-in-law bought me Annie Sloan paint in Old White as an early birthday gift and I got to work. This paint is amazing because you don’t need to do any kind of sanding or resurfacing. Just paint and you are done!

It turned out so great and only took me one day to complete. We plan on purchasing a contoured diaper changing pad to place on top. I think it will be wonderful for storage of diaper-related items, personal care items, and clothes.

I really wanted to keep the original hardware so I just spray painted them! Love the pop of color against the white! I’m really hoping to find some great drawer organizers, too, for all of those little things we’ll be keeping in here.

The nursery colors will be red, yellow, and turquoise/teal blue with grey. I want a room that can be used well into the toddler years and I think these colors will definitely work for either a boy or girl without being too gender specific.

This was the piece that started it all! Can’t wait to see how this room comes together. I already love stepping inside it and picturing it all set up with a little baby in my arms. 🙂